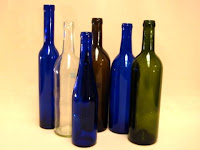
 The last step in the winemaking process (other than consumption!) is to bottle your wine. Bottling your wine is not as difficult a process as you might think!
Equipment that you will need (or want) includes your siphon equipment (flexible tubing and either your racking cane or your auto-siphon) and if you want to make the process very simple you can obtain a bottle filler from us at http://www.bluestemwine.com/.
If you use only the siphon equipment then you will want to fill the bottles to within about 2 inches of the top to allow room for the insertion of your cork. If you obtain the bottle filler (a very low cost item) you will have this attached to the end of your siphon hose that goes into the bottle. The bottle filler has a valve (ours is spring loaded but some are not and if you prefer you can remove the spring from ours) which is closed from the pressure of the wine above the valve. After starting the siphon process you insert the bottle filler into the bottle and press the valve against the bottom of the bottle. The pressure you apply causes the valve to open and wine flows into your bottle from the bottom to the top (less oxygenation this way because of no splash). When your bottle is full to within about one-quarter inch from the top you lift up which causes the valve to close and shut off the flow of wine. Removing the bottle filler from the bottle lowers the wine level to just the right place for cork insertion.
You will need five 750ml wine bottles for every gallon of wine you have made. You can purchase bottles in several sizes and colors from us at http://www.bluestemwine.com/ or you can accumulate and recycle previously used wine bottles. Make sure that you wash your bottles thoroughly with dish soap and water, rinse and then use a sanitizer (see previous blog article titled Winemaking 101 for procedure) to give your bottles a final rinse.
Corks come in several sizes. Most are either 1-1/2 or 1-3/4 inches long but they also are available in three different diameters and are called either No. 7’s, No. 8’s or No. 9’s. The sevens are the smallest diameter corks and are the easiest to insert if you are using a simple hand corker. The eights are a little for difficult to insert with the hand corker and the nines should only be used if you have a floor model corker which can compress the corks to a small enough diameter for easy insertion. Corks also come in many different grades and compositions. The better corks should be used if you intend to store your wine for extended periods of time.
Corks, too, need to be sterilized prior to bottling your wine. Again there are several ways to sterilize corks. First, you can use a teaspoon of sulphite powder (potassium or sodium metabisulphite) in hot water and soak your corks in this solution. A method that works well for winemakers using hand corkers or double lever corkers is to steam their corks in a double boiler. This helps in two ways. First, the steam sterilizes the corks and second it softens the corks up for easier insertion.
After corking allow your bottles to stand upright for approximately three days. After the three day period you can store your wine bottles in a horizontal position. After appropriate aging your wine will be ready to enjoy. Don’t wait! Start your next batch of wine now and keep the supply of wine coming! Check out our WinExpert grape varietal ingredient kits on our website at http://www.bluestemwine.com/ for some absolutely fantastic home made wine!


No comments:
Post a Comment