
BlueStem Winery is excited at the prospect of offering 18 liter wine kits (with the crushed grape packs) from Cellar Craft International. These wine kits will be available approximately August 15, 2007 from our website at http://www.bluestemwine.com/ and we hope you will take a look at these premium quality 16 liter wine kits that have a 2 liter crushed grape pack accompanying the ingredient kit.
Rosso Fortissimo is a Super-Tuscan style wine which uses Cabernet Sauvignon, Merlot and Sangiovese grapes along with other Italian varietals. This wine is fermented over crushed Merlot grapes from Washington's Yakima Valley.
Rosso Fortissimo is a big, full-bodied wine with solid structure and bold fruit notes and features complex cassis, plum and cherry flavors to balance its bold tannins.
French and American oak contribute a toasty vanilla flavor and add greater depth to this intense wine.
This wine requires a minimum of six months aging and 12 months is much better. A very special wine will be yours to enjoy if you can bottle age this wine for 2 years.
BlueStem Winery specializes in efficient, friendly service while providing high quality ingredients, supplies, and equipment for your wine making and home beer brewing hobbies. We offer high quality winemaking ingredient kits from WinExpert and will soon be offering many of the superb quality kits of Cellar Craft International. Our home brewing ingredient kits are headlined by our very own line of partial mash kits called BlueStem's Best. Visit our new website (much improved over our first effort!) at http://www.bluestemwine.com/ for a complete lineup of the things you need for making wine and for homebrewing. We look forward to serving you soon!
Sunday, July 22, 2007

Saturday, July 21, 2007
Cellar Craft Amarone Wine Kit
This coming Wednesday (7/25/07) we will be placing our first order with Cellar Craft International out of Surrey, British Columbia, Canada. BlueStem Winery is excited about adding the Cellar Craft label wine ingredient kits to our already stellar lineup of WinExpert wine ingredient kits. I am going to spend a few days on the blog doing write-ups about the Cellar Craft kits that we will be stocking with the first being the Cellar Craft Showcase Amarone 18 liter kit (16 liters of juice with a 2 liter crushed grape pack which includes the skins from over 12 pounds of varietal grapes).
Amarone is a legendary wine from the Valpolicella region of Italy. Its unique character comes from the addition of dried grapes during fermentation. The depth that results is similar to a Port or Late Harvest wine but without the sweetness.
The Cellar Craft Showcase Amarone ingredient kit received 9 medals in the 2006 Wine Maker Magazine competition. The wines foundation is Corvina, Rondinella and Molinara grapes from the Veneto region of Italy. The must is fermented on crushed varietal grapes from over ten pounds of virgin fruit plus four pounds of whole red wine grapes which have been sun-dried to perfection. A double dose of untoasted American oak is used to balance the wine and, with aging, tame the natural tannins.
This wine is very full-bodied with a deep red color and is richly dry. It features notes of plum, sour cherry, raspberry and vanilla which blend with flavors hints of anise, bitter chocolate, coffee, tobacco, leather and fig that develop with age. This wine features a long, lingering finish and alcohol that should exceed 15%. To enjoy this wine to its fullest this wine should be given at least 12 months to age.
This wine kit and many others from Cellar Craft International will be available at BlueStem Winery within a few weeks and will also be available on our website at www.bluestemwine.com.
Enjoy!
Amarone is a legendary wine from the Valpolicella region of Italy. Its unique character comes from the addition of dried grapes during fermentation. The depth that results is similar to a Port or Late Harvest wine but without the sweetness.
The Cellar Craft Showcase Amarone ingredient kit received 9 medals in the 2006 Wine Maker Magazine competition. The wines foundation is Corvina, Rondinella and Molinara grapes from the Veneto region of Italy. The must is fermented on crushed varietal grapes from over ten pounds of virgin fruit plus four pounds of whole red wine grapes which have been sun-dried to perfection. A double dose of untoasted American oak is used to balance the wine and, with aging, tame the natural tannins.
This wine is very full-bodied with a deep red color and is richly dry. It features notes of plum, sour cherry, raspberry and vanilla which blend with flavors hints of anise, bitter chocolate, coffee, tobacco, leather and fig that develop with age. This wine features a long, lingering finish and alcohol that should exceed 15%. To enjoy this wine to its fullest this wine should be given at least 12 months to age.
This wine kit and many others from Cellar Craft International will be available at BlueStem Winery within a few weeks and will also be available on our website at www.bluestemwine.com.
Enjoy!
Wednesday, July 18, 2007
Choosing Wine Yeast
Whenever you make wine whether from your own grapes, fruit or from a commercially made wine kit there is one ingredient that is always present and used--even if you do not purchase it. Yeast is a necessary component of every batch of wine and whether you purchase it or whether it comes with the kit or whether you just the natural yeasts that are present on your backyard fruit, everyone uses yeast.
Wine yeasts vary in numerous ways including the speed with which they ferment, how throughly they complete the fermentation, their ability to settle out of the wine after their job is complete (this is called flocculation), how much foam the yeast produces and how healthy the yeast is that you are using.
Wine kit manufacturers are especially concerned with the speed at which the yeast ferments (most manufacturers advertise 28 day kits, etc.). They also want the yeast to complete its job (by converting the appropriate amount of sugar in alcohol) because unfinished wine can be too sweet and be too low in alcohol content.
Flocculation is very important because the wine kit manufacturers want the wines produced by their kits to be aesthetically pleasing. The reason that low foam is important is that too much foam present during fermentation can cause what is called a "blowout". Foam can force the airlock right out of the fermenter.
The health of the yeast is important because this is key to the yeast being able to begin fermentation in pasteurized juice, juice concentrates or in the juice of your backyard fruit.
Each yeast adds its own particular traits to the wine. Should you change yeasts? We do not know! Unless we have made a particular wine using more than one type of yeast we will not know if one is better than the other. If you feel the need, experiment!
Wine yeasts vary in numerous ways including the speed with which they ferment, how throughly they complete the fermentation, their ability to settle out of the wine after their job is complete (this is called flocculation), how much foam the yeast produces and how healthy the yeast is that you are using.
Wine kit manufacturers are especially concerned with the speed at which the yeast ferments (most manufacturers advertise 28 day kits, etc.). They also want the yeast to complete its job (by converting the appropriate amount of sugar in alcohol) because unfinished wine can be too sweet and be too low in alcohol content.
Flocculation is very important because the wine kit manufacturers want the wines produced by their kits to be aesthetically pleasing. The reason that low foam is important is that too much foam present during fermentation can cause what is called a "blowout". Foam can force the airlock right out of the fermenter.
The health of the yeast is important because this is key to the yeast being able to begin fermentation in pasteurized juice, juice concentrates or in the juice of your backyard fruit.
Each yeast adds its own particular traits to the wine. Should you change yeasts? We do not know! Unless we have made a particular wine using more than one type of yeast we will not know if one is better than the other. If you feel the need, experiment!
Sunday, July 15, 2007
Bottling Your Homemade Wine II
 From the time your wine has completed its fermentation it should really rest for approximately three months (or more) prior to bottling. During this resting period you should continue to rack your wine to a clean carboy at approximately one month intervals. By taking the wine off of its settlings you will help insure that your wine becomes crystal clear. A wine that goes into the bottle cloudy will deposit sediments on the bottom (or on the side of the bottle if lying flat). Wine that does not clear should be treated with a fining agent such as LQ KC Super Clear, Isinglass, Chitosan or Sparkolloid. These products are all available on our website at http://www.bluestemwine.com/. BlueStem Winery recommends that you correspond with us regarding the usage of these products.
There is actually no rush to bottle your wine! Wine which is aged in bulk in a carboy will actually mature much faster than wine which is aged in a bottle. You may store your wine in a carboy as long as you keep the carboy full and sealed from contact with air. BlueStem recommends the addition of one crushed Campden tablet per gallon of wine if you are planning to bulk store your wine for an extended period of time. If you are positive that your wine has totally finished its fermentation you can store the wine in a carboy and seal the carboy with an undrilled stopper. If unsure, you should continue to store your wine using an airlock. Do not stabilize or sweeten your wine until you are ready to bottle.
There are advantages to bulk storing your wine in addition to the faster maturation. Young wines can sometimes have an acidic bite which is not desirable. One of the ways that this acidic bite can be masked is to sweeten but by sweetening too early you can actually sweeten your wine too much in your attempt to mask this acidic taste. By letting your wines bulk age prior to sweetening much or all of this acidic bite will disappear on its own.
When you are ready to bottle your wine you should stabilize the wine (using Potassium Sorbate) and if you are going to sweeten your wine it should be done now. Once stabilized and sweetened your wine should be bottled.
If there is sediment in your carboy you should rack the wine just prior to stabilizing, sweetening and bottling. Try to avoid any oxygenation of your wine during this transfer.
Your bottles should be washed thoroughly, rinsed and both your bottles and corks will need to be sanitized prior to bottling. Wash your bottles thoroughly with dish soap and water and then rinse them thoroughly with clean water. A final rinse using a no rinse product such as Easy Clean (available at http://www.bluestemwine.com/) should follow this washing. Bottles should then be soaked in a solution of Ascorbic Acid (1/4 tsp), Potassium Metabisulphite (1/4 tsp) and warm water (40 ounces). Drain your bottles but do not rinse.
Your corks can be soaked in a solution of Potassium Metabisulphite (3 tsp) and a gallon of clean water. Your corks should remain submerged for a period of 30 minutes in this solution. A conventional wine cork is recommended over the use of plastic stoppers, T-corks or screw caps.
Leave your corked wine bottles upright for approximately 3 days (to allow complete expansion of the cork) prior to placing the bottles on their side. Screw capped bottles should be stored upright.
Saturday, July 14, 2007
Acid Testing Juice for Homemade Wine
 These instructions relate to the pictured acid testing kit (also known as an Acid Titration Kit) sold on our website at http://www.bluestemwine.com/. Click on the photo to take you directly to this product on our website.
The contents of the package include a one ounce vial of Color Indicator Solution, a four ounce vial of Sodium Hydroxide Solution, one 25cc syringe and one 30cc plastic cup. The liquid contents of this kit are poisonous.
Draw a 15cc sample of the liquid to be tested with the syringe. Make sure no bubbles remain in the syringe. Place this sample in the plastic cup.
Add two droplets of the Indicator Solution to the cup and swirl the cup to disburse the droplets.
Using the syringe, draw 10cc of the Sodium Hydroxide Solution. Again, make sure that there are no air bubbles present.
Using the syringe, add one drop at a time of the Sodium Hydroxide Solution to the cup of liquid with the juice/wine and indicator solution in it. After each drop you should swirl the cup to disburse the Sodium Hydroxide. When making white wine the adding of a drop of Sodium Hydroxide will color the liquid pink. When you swirl the cup the pink will disappear (when making red wine the liquid will turn black and when you swirl it will go back to a red/purple color). Continue adding the droplets and swirling each time until the pink (black) coloration is permanent. You will notice that as you approach the permanent coloration it will take more swirls to eliminate the pink (black) coloration.
If you have trouble with seeing the color change in your red wine you can add distilled water (40cc) to the wine sample. Dilution of your wine/juice will not affect the test results. When doing this the color change you are looking for is to a green or purple color.
Testing your sample multiple times will give you a better feel for the accuracy of your test. You should average the test results to draw your conclusion. Be sure to thoroughly rinse your test equipment in between each test.
After completing your testing make the necessary corrections to your wine/juice to obtain the proper acid levels. Test liquids should NOT be returned to your wine/juice but should be disposed of.
Rinse out your test equipment thoroughly prior to storage. Keep solutions tightly capped. The shelf life on each solution is about 12 months so dispose of these as appropriate.
FYI: One teaspoon of acid (tartaric, malic, citric, acid blend) added to one gallon of wine/juice will increase your acid level by approximately .15%.
Optimum acid levels for wine are:
Fruit wines: .50 to .60%
Red wines: .55 to .65%
White wines: .70 to .80%
Questions? We respond to e-mails addressed to bluestemwine@mchsi.com or you can contact us through our website at http://www.bluestemwine.com/. Happy wine making!!
Friday, July 13, 2007
Cleaning and Sanitizing
There is a difference! Cleaning is only the first step in insuring that your beer or wine has as good a chance as possible of getting off to a good start. Sanitizing is the second step in this process. You cannot do one without the other!
Cleaning involves the use of a detergent which cleans away dirt, grime, residues, etc. from your fermenter and other equipment. There are many types of cleaning detergents available including tri-sodium phosphates (TSPs). My cleaning process actually begins when I finish a batch of wine or beer. I give my equipment a thorough cleaning with detergent (I use good old dishwashing detergent) and water immediately after racking my beer or wine out of the fermenter. This is the time when the residues are soft and the easiest to remove. After a thorough scrubbing with dish soap and water I give my equipment a thorough rinsing and turn it upside down to dry. When I am ready to brew or make wine again my equipment is relatively clean.
When I am ready to make another batch I again wash my equipment with dishwashing detergent and water and then thoroughly rinse the equipment with water prior to beginning the sanitizing of the equipment.
Most brewers and winemakers use either chlorine bleach or iodine solutions to sanitize their equipment. You can also use a "no rinse" cleanser. The products we sell at BlueStem Winery for sanitizing include B-T-F Iodophor Sanitizer (an iodine based sanitizer) and Easy Clean (a "no rinse" oxygen-based sanitizer). We have had very good luck using both of these products. Contact time with your equipment should be approximately 15 minutes.
A chlorine bleach solution should be mixed at the ratio of 2 tablespoons per gallon of water while an iodine solution should be mixed at a ratio of 1-1/2 teaspoons per gallon of water. Thoroughly rinse with good water after using these solutions.
Remember to always clean before you sanitize and to always rinse thoroughly (except after using a "no rinse" sanitizer).
You can find both B-T-F Iodophor and Easy Clean on the BlueStem Winery website at www.bluestemwine.com.
Cleaning involves the use of a detergent which cleans away dirt, grime, residues, etc. from your fermenter and other equipment. There are many types of cleaning detergents available including tri-sodium phosphates (TSPs). My cleaning process actually begins when I finish a batch of wine or beer. I give my equipment a thorough cleaning with detergent (I use good old dishwashing detergent) and water immediately after racking my beer or wine out of the fermenter. This is the time when the residues are soft and the easiest to remove. After a thorough scrubbing with dish soap and water I give my equipment a thorough rinsing and turn it upside down to dry. When I am ready to brew or make wine again my equipment is relatively clean.
When I am ready to make another batch I again wash my equipment with dishwashing detergent and water and then thoroughly rinse the equipment with water prior to beginning the sanitizing of the equipment.
Most brewers and winemakers use either chlorine bleach or iodine solutions to sanitize their equipment. You can also use a "no rinse" cleanser. The products we sell at BlueStem Winery for sanitizing include B-T-F Iodophor Sanitizer (an iodine based sanitizer) and Easy Clean (a "no rinse" oxygen-based sanitizer). We have had very good luck using both of these products. Contact time with your equipment should be approximately 15 minutes.
A chlorine bleach solution should be mixed at the ratio of 2 tablespoons per gallon of water while an iodine solution should be mixed at a ratio of 1-1/2 teaspoons per gallon of water. Thoroughly rinse with good water after using these solutions.
Remember to always clean before you sanitize and to always rinse thoroughly (except after using a "no rinse" sanitizer).
You can find both B-T-F Iodophor and Easy Clean on the BlueStem Winery website at www.bluestemwine.com.
Thursday, July 12, 2007
"Old Style" Acid Blend for Your Wines
 For the first few years that our wine and beer making supply store existed we sold acid blend which we purchased already mixed from our wholesaler.
 Our own homemade wines seemed to have an acidic taste similar to the bite you would taste from a grapefruit or a lemon and we suspected that this acid bite was coming from the acid blend.
Upon questioning our wholesaler we learned that their acid blend was a 50-40-10 mix of citric, malic and tartaric acids. Research on the internet told us that years ago acid blend was a 40-40-20 blend of tartaric, malic and citric acids. Comparing the old formula with the new formula showed a 30% increase in citric acid and a 30% decrease in tartaric while the malic acid level remained unchanged. Why the change? I suspect it is economic! Tartaric acid is much more expensive than citric acid.
Although we do not know for sure (we think we do!) that the acid bite was coming from the high citric levels in our acid blend, we have since stopped purchasing pre-mixed acid blend and the acid blend sold at BlueStem Winery (or on the web at http://www.bluestemwine.com/) is a 50-40-10 mix of tartaric, malic and citric acids. Our citric bite has gone away. Our acid blend is a little more expensive but we think the results justify the increased cost.
Wednesday, July 11, 2007
Astringent Aftertaste in Your Homebrew?
If your homebrew consistently has an astringent afterbite (it makes your mouth pucker), it most likely is simply that you are overdosing your hops. If your beer is consistently bitter try two things:
First, the quantity of your hop infusions, and
Second, be sure that, when steeping your grains that you do not steep at above 150 degrees Fahrenheit.
Need brewing ingredients, equipment or supplies? Visit our website at www.bluestemwine.com for a complete line of both brewing and winemaking equipment, supplies, ingredients and ingredient kits.
First, the quantity of your hop infusions, and
Second, be sure that, when steeping your grains that you do not steep at above 150 degrees Fahrenheit.
Need brewing ingredients, equipment or supplies? Visit our website at www.bluestemwine.com for a complete line of both brewing and winemaking equipment, supplies, ingredients and ingredient kits.
Sunday, July 8, 2007
A Brief Outline for Beginning Brewers
 First, if using a dry brewer's yeast (there are many brand names and types available including Coopers, Danstar Nottingham, Danstar Windsor, and Brewferm) you either pitch this yeast dry by sprinkling on top of your wort or you can prepare a starter yeast culture prior to putting together your batch of beer. If using a liquid yeast such as a White Labs yeast the yeast is ready to go and you can begin the brewing process.
Good water needs to be available for making your beer. If your tap water tastes good it can be used, otherwise, buy some drinking water at your local supermarket. Your "brewpot" should be a stainless steel or ceramic coated (no chips in the ceramic coating!) pot from 20 to 30 quarts in size (the larger size is needed if making beers using a large amount of malted grains). Fill your brewpot approximately half full of water and begin heating.
Some recipes use malted grains and you should crush these grains (coarsely) with a rolling pin and place them in a muslin grain bag (all equipment, supplies and ingredients are available on BlueStem Winery's website at and tie a knot in the top of the bag. Steep these grains in your heated water (at the recipe's prescribed time and temperature). This steeping will add color, flavor, body and fermentable sugars to your beer. Remove the bag of grains from the brewpot per your recipe. Bring the water in your brewpot to a boil.
After the water has begun boiling remove the brewpot from your stove and gradually stir in any malt extract syrups and/or dry malt extracts (sometimes called spray-dried malt extract) that the recipe calls for. Liquid malt extract will pour more easily from the can if you have warmed the can by leaving it set in warm water for awhile prior to needing it.
Put your brewpot back on the stove and bring the liquid back to a boil. Most recipes will call for boiling your wort (this is what your beer is called at this stage) for 60 minutes and for adding hops (called hop infusions) once, twice or more during the boil. Your recipe will tell you at what time, in what quantity and what type of hop pellets to use.
While your wort is coming to a boil and during the boil you should sanitize all of the equipment that you will be using after the boil is finished. Sanitize your brewing bucket, the lid, hydrometer, airlock, spoon, thermometer and any other equipment which will come in contact with your wort using a "no rinse" cleanser such as Easy Clean (available at http://www.bluestemwine.com/).
After your boil is complete you will need to cool your wort to approximately 75 degrees Fahrenheit as quickly as possible. There are several methods you can use to do this with the most efficient being the use of a wort chiller (cold water is passed through a coil of copper tubing which is suspended in your wort). You can also use an ice bath. To do this place your brewpot into a sink and pack ice around it.
Pour the chilled wort into your sanitized fermenter and add water to bring the total volume to five gallons. Your wort temperature should be in the 70 to 75 degree range.
Pitch (this means "to add") your yeast into your wort. Seal your fermenter tightly and attach a sanitized airlock filled to the fill line with water.
Within 24 (sometimes 48) hours most beers will show signs of fermentation (bubbling). Most beer recipes will require fermentation for from 3 to 6 days or maybe a little longer. Temperature is probably the biggest factor in determining length of fermentation with warmer temperature surroundings speeding fermentation.
When fermentation is complete the brewer can either siphon the beer off for immediate bottling or the beer can be conditioned by transfer to a 5-gallon glass carboy for what is called secondary fermentation.
When ready to bottle your beer it should be siphoned to a bottling bucket which is equipped with a spigot. Approximately one cup (5 ounces) of corn sugar is required to prime the beer. Adding corn sugar to your beer provides additional food for the yeast which remains present and when sealed in a bottle the carbon dioxide which results from this new fermentation has no where to escape to and becomes the carbonation for your beer. Combine the 5 ounces of corn sugar with a small amount of water and heat on the stove until the sugar is totally dissolved. Add this syrup to the beer in the bottling bucket and stir until the sugar is evenly disbursed within the liquid. This insures that each bottle of beer will have the same amount of sugar for carbonation. Your bottled beer should be left for 14 to 21 days to insure full carbonation.
After carbonation you should chill your homebrew and enjoy! Gently pour your beer so as to leave behind the yeast settlings which will be present in the bottom of the bottle (these settlings are packed with B vitamins but they will cloud your beer if your pour too quickly). Cheers!
Saturday, July 7, 2007
Bottling Your Homemade Wine
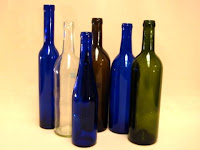 The last step in the winemaking process (other than consumption!) is to bottle your wine. Bottling your wine is not as difficult a process as you might think!
Equipment that you will need (or want) includes your siphon equipment (flexible tubing and either your racking cane or your auto-siphon) and if you want to make the process very simple you can obtain a bottle filler from us at http://www.bluestemwine.com/.
If you use only the siphon equipment then you will want to fill the bottles to within about 2 inches of the top to allow room for the insertion of your cork. If you obtain the bottle filler (a very low cost item) you will have this attached to the end of your siphon hose that goes into the bottle. The bottle filler has a valve (ours is spring loaded but some are not and if you prefer you can remove the spring from ours) which is closed from the pressure of the wine above the valve. After starting the siphon process you insert the bottle filler into the bottle and press the valve against the bottom of the bottle. The pressure you apply causes the valve to open and wine flows into your bottle from the bottom to the top (less oxygenation this way because of no splash). When your bottle is full to within about one-quarter inch from the top you lift up which causes the valve to close and shut off the flow of wine. Removing the bottle filler from the bottle lowers the wine level to just the right place for cork insertion.
You will need five 750ml wine bottles for every gallon of wine you have made. You can purchase bottles in several sizes and colors from us at http://www.bluestemwine.com/ or you can accumulate and recycle previously used wine bottles. Make sure that you wash your bottles thoroughly with dish soap and water, rinse and then use a sanitizer (see previous blog article titled Winemaking 101 for procedure) to give your bottles a final rinse.
Corks come in several sizes. Most are either 1-1/2 or 1-3/4 inches long but they also are available in three different diameters and are called either No. 7’s, No. 8’s or No. 9’s. The sevens are the smallest diameter corks and are the easiest to insert if you are using a simple hand corker. The eights are a little for difficult to insert with the hand corker and the nines should only be used if you have a floor model corker which can compress the corks to a small enough diameter for easy insertion. Corks also come in many different grades and compositions. The better corks should be used if you intend to store your wine for extended periods of time.
Corks, too, need to be sterilized prior to bottling your wine. Again there are several ways to sterilize corks. First, you can use a teaspoon of sulphite powder (potassium or sodium metabisulphite) in hot water and soak your corks in this solution. A method that works well for winemakers using hand corkers or double lever corkers is to steam their corks in a double boiler. This helps in two ways. First, the steam sterilizes the corks and second it softens the corks up for easier insertion.
After corking allow your bottles to stand upright for approximately three days. After the three day period you can store your wine bottles in a horizontal position. After appropriate aging your wine will be ready to enjoy. Don’t wait! Start your next batch of wine now and keep the supply of wine coming! Check out our WinExpert grape varietal ingredient kits on our website at http://www.bluestemwine.com/ for some absolutely fantastic home made wine!
Thursday, July 5, 2007
Winemaking 101 ~ Getting Started
At BlueStem Winery we can tell what time of the year it is without looking at the calendar—especially when spring is coming to an end and the hot humid weather of Iowa’s summers are coming. How can we tell? Just by the type of fruit that the local winemakers are making. The first sign of summer coming is when the winemakers are coming in for ingredients for their rhubarb wine. Pretty soon it is time for strawberries and raspberries and the other fruit of early to mid-summer and then it is the wines of autumn when the pears, apples, grapes and plums are harvested. My favorite winemakers are the ones venturing off to try it for the first time. Their enthusiasm is contagious as they listen intently to tips on how to use equipment and the steps required to make homemade fruit wine.
No matter what kind of fruit or which variety of fruit that you have to work with, the general techniques, equipment and ingredients used for making wine are the same.
Recommended equipment for making your first batch of homemade wine:
6.5 gallon food grade plastic pail (for 5 gallon batches) or 7.9 gallon for 6 gallon batches
Lid for the size pail you purchase which has been drilled & grommeted for airlock usage
5 gallon or 6 gallon glass carboy (having 2 of the same size makes it easier!)
Bung (to fit neck of your carboy) with fermentation lock (also called an airlock)
Nylon straining bag (the larger size works much better)
Hydrometer
Thermometer
Acid titration kit
Racking cane with anti-sediment tip (for siphoning) or an Auto-Siphon (much easier!)
Food grade clear plastic tubing (sized to match your racking tube or auto-siphon)
Shut-off clamp sized to your plastic tubing
25 or 30 (depending on whether you are making 5 or 6 gallons ) 750-ml wine bottles
Corks (which size you purchase depends on which style of corker you obtain)
Corker
All of this equipment is available by calling BlueStem Winery at 319.346.1046 (see our website at http://www.bluestemwine.com/ for store hours) or you can order direct on our website. We love to have you call because it seems that beginners always have questions and we love to take the time to walk you through the process.
Winemaking Rule 1: Keep it clean! Keep your equipment clean! Keep everything that comes in contact with your wine clean! Wash your equipment with hot water (boiling if possible) and dish soap and then rinse with clean water. Then, after rinsing with water, rinse your equipment with a good “No Rinse” cleanser (BlueStem sells and uses a product called “Easy Clean”) or a strong solution made with sodium or potassium metabisulphite. You can make this solution by dissolving three tablespoons of sulphite powder in a gallon of warm water. BlueStem sells both potassium metabisulphite and potassium Campden tablets (if you do not have powder you can crush Campden tablets to make a powder as Campden tablets are simply a tablet form of potassium metabisulphite). BlueStem recommends the use of the Easy Clean product.
Winemaking Rule 2: Refer to Rule No. 1!
Always match your batch size to the size carboys that you have. If you have a five gallon carboy make a 5 gallon batch of wine (a partially full carboy will cause your wine to oxidize and spoil). Some people make only one gallon batches which is okay if you make really bad wine! If you make really good wine you will be out of wine quickly. Absolutely no one has as many friends as a really good home winemaker! Well, maybe a good home brewer could compete!
Good winemaking starts with good fruit! You can determine that your fruit (or grapes) are ripe by crushing a handful or two and measuring the sugar level of the juice using your hydrometer (the winemaker’s most important tool). Typically your sugar level should be approximately 22° Brix (or about 1.098 on the Specific Gravity scale). This gives your juice the potential to make approximately 11% alcohol. Inspect your fruit to make sure it is clean (no stems, leaves, etc.) and free of insects. The fruit should be sound, ripe, sweet and somewhat tart.
After you have your equipment in hand and have enough fruit or grape product to make your batch of wine and have tested your fruit for sugar content, you need to check the acid level of your fruit. Acid level is measured with an acid titration kit. For dry red wines the desired acid level is from 6g/L to 7g/L and for dry whites it is from 6.5g/L to 7.5g/L. Measuring for acid concentration is very important!
Increasing your acid level is accomplished by adding tartaric acid (available on the website or in our store at 305 Third St., Parkersburg, Iowa). After checking your wine and determining that your wine is deficient in acid you should add tartaric acid (slowly) to your wine must. Check for acidity level after each acid addition until you reach the acid level that you desire. For an example let us say that you wish to make a dry white wine and your must has a present acidity level of 6g/L and you wish to increase this to 7g/L. By adding 3.8 grams of tartaric acid (for each gallon of must in your batch) you will increase your total acidity by 1g/L. If you have a 5 gallon batch (using our example) you will add approximately 19 grams of tartaric acid to raise the acid level from 6g/L to 7g/L. Again—do this slowly and measure total acidity after each addition! Tartaric acid is also available at http://www.bluestemwine.com/!
Does your wine must have the appropriate level of sugar? Red and white grape wines should measure approximately 22° Brix (this is sometimes called the Balling scale on your hydrometer) or 1.098 on the Specific Gravity scale. If your specific gravity (SG is too high (over 1.098) you can dilute your juice with water. If your SG is too low you can add sugar syrup gradually (mix well and check your hydrometer reading often) by taking 2 cups of sugar and 1 cup of water, bringing it to a boil and then letting it cool..
70° Fahrenheit (+/- 5°) is a temperature range to aim for. White grape must is sometimes fermented at a cooler temperature. The cooler your fermenting temperature is the slower the fermentation while occur. If your fermentation is going to take place in a cooler area, BlueStem Winery recommends using a “brew belt” which you can wrap around your fermenter and plug in to increase the temperature of your must. It is heat controlled by a thermostat to keep your must at an optimum temperature.
Now, your wine has been started and you have been checking and recording the condition of your wine frequently. Maintain a record of ingredients, dates, temperatures, and specific gravity readings so that you can duplicate a recipe that turns out really good! When your wine has fermented partially (many recipes call of moving your wine to a sealed, clean container when the SG has reached 1.040 or less) you will “rack” (transfer) your wine to get it off the sediment on the bottom of your primary fermenter. Use a racking tube or an Auto-Siphon and a short length of plastic tubing to siphon your wine to a clean secondary (carboy) fermenter while trying to pick up as little of the sediment as possible from the bottom of your primary fermenter. Make sure that you sanitize all equipment which will come in contact with your wine! Your carboy should be full (up to the base of the neck) with your wine must when you have completed the racking. If not full, top the carboy off with reserved juice (if available) or clean water. Seal your carboy with a bung and airlock.
Want an easy way to get started making fruit wine? BlueStem has 3-gallon, 5-gallon and 6-gallon fruit wine kits available on our website. The kits are available in several configurations and include all the equipment you need plus a wide variety of fruit choices (yes, the fruit and other ingredients are included!) with all required ingredients included (pre-measured).
If you prefer a grape wine, BlueStem has 6-gallon winemaking equipment packages available which you can use in conjunction with a WinExpert ingredient kit. We stock the Vintner’s Reserve, World Vineyard, Selection Original, Selection International, Selection Estate, Selection Limited Edition and Selection Speciale kits (these are 3 gallon kits) available in many, many varietals (including Riesling, Chardonnay, Zinfandel, Shiraz, Merlot). These kits make very, very good wine!
Tomorrow’s topic: Bottling your first wine!
No matter what kind of fruit or which variety of fruit that you have to work with, the general techniques, equipment and ingredients used for making wine are the same.
Recommended equipment for making your first batch of homemade wine:
6.5 gallon food grade plastic pail (for 5 gallon batches) or 7.9 gallon for 6 gallon batches
Lid for the size pail you purchase which has been drilled & grommeted for airlock usage
5 gallon or 6 gallon glass carboy (having 2 of the same size makes it easier!)
Bung (to fit neck of your carboy) with fermentation lock (also called an airlock)
Nylon straining bag (the larger size works much better)
Hydrometer
Thermometer
Acid titration kit
Racking cane with anti-sediment tip (for siphoning) or an Auto-Siphon (much easier!)
Food grade clear plastic tubing (sized to match your racking tube or auto-siphon)
Shut-off clamp sized to your plastic tubing
25 or 30 (depending on whether you are making 5 or 6 gallons ) 750-ml wine bottles
Corks (which size you purchase depends on which style of corker you obtain)
Corker
All of this equipment is available by calling BlueStem Winery at 319.346.1046 (see our website at http://www.bluestemwine.com/ for store hours) or you can order direct on our website. We love to have you call because it seems that beginners always have questions and we love to take the time to walk you through the process.
Winemaking Rule 1: Keep it clean! Keep your equipment clean! Keep everything that comes in contact with your wine clean! Wash your equipment with hot water (boiling if possible) and dish soap and then rinse with clean water. Then, after rinsing with water, rinse your equipment with a good “No Rinse” cleanser (BlueStem sells and uses a product called “Easy Clean”) or a strong solution made with sodium or potassium metabisulphite. You can make this solution by dissolving three tablespoons of sulphite powder in a gallon of warm water. BlueStem sells both potassium metabisulphite and potassium Campden tablets (if you do not have powder you can crush Campden tablets to make a powder as Campden tablets are simply a tablet form of potassium metabisulphite). BlueStem recommends the use of the Easy Clean product.
Winemaking Rule 2: Refer to Rule No. 1!
Always match your batch size to the size carboys that you have. If you have a five gallon carboy make a 5 gallon batch of wine (a partially full carboy will cause your wine to oxidize and spoil). Some people make only one gallon batches which is okay if you make really bad wine! If you make really good wine you will be out of wine quickly. Absolutely no one has as many friends as a really good home winemaker! Well, maybe a good home brewer could compete!
Good winemaking starts with good fruit! You can determine that your fruit (or grapes) are ripe by crushing a handful or two and measuring the sugar level of the juice using your hydrometer (the winemaker’s most important tool). Typically your sugar level should be approximately 22° Brix (or about 1.098 on the Specific Gravity scale). This gives your juice the potential to make approximately 11% alcohol. Inspect your fruit to make sure it is clean (no stems, leaves, etc.) and free of insects. The fruit should be sound, ripe, sweet and somewhat tart.
After you have your equipment in hand and have enough fruit or grape product to make your batch of wine and have tested your fruit for sugar content, you need to check the acid level of your fruit. Acid level is measured with an acid titration kit. For dry red wines the desired acid level is from 6g/L to 7g/L and for dry whites it is from 6.5g/L to 7.5g/L. Measuring for acid concentration is very important!
Increasing your acid level is accomplished by adding tartaric acid (available on the website or in our store at 305 Third St., Parkersburg, Iowa). After checking your wine and determining that your wine is deficient in acid you should add tartaric acid (slowly) to your wine must. Check for acidity level after each acid addition until you reach the acid level that you desire. For an example let us say that you wish to make a dry white wine and your must has a present acidity level of 6g/L and you wish to increase this to 7g/L. By adding 3.8 grams of tartaric acid (for each gallon of must in your batch) you will increase your total acidity by 1g/L. If you have a 5 gallon batch (using our example) you will add approximately 19 grams of tartaric acid to raise the acid level from 6g/L to 7g/L. Again—do this slowly and measure total acidity after each addition! Tartaric acid is also available at http://www.bluestemwine.com/!
Does your wine must have the appropriate level of sugar? Red and white grape wines should measure approximately 22° Brix (this is sometimes called the Balling scale on your hydrometer) or 1.098 on the Specific Gravity scale. If your specific gravity (SG is too high (over 1.098) you can dilute your juice with water. If your SG is too low you can add sugar syrup gradually (mix well and check your hydrometer reading often) by taking 2 cups of sugar and 1 cup of water, bringing it to a boil and then letting it cool..
70° Fahrenheit (+/- 5°) is a temperature range to aim for. White grape must is sometimes fermented at a cooler temperature. The cooler your fermenting temperature is the slower the fermentation while occur. If your fermentation is going to take place in a cooler area, BlueStem Winery recommends using a “brew belt” which you can wrap around your fermenter and plug in to increase the temperature of your must. It is heat controlled by a thermostat to keep your must at an optimum temperature.
Now, your wine has been started and you have been checking and recording the condition of your wine frequently. Maintain a record of ingredients, dates, temperatures, and specific gravity readings so that you can duplicate a recipe that turns out really good! When your wine has fermented partially (many recipes call of moving your wine to a sealed, clean container when the SG has reached 1.040 or less) you will “rack” (transfer) your wine to get it off the sediment on the bottom of your primary fermenter. Use a racking tube or an Auto-Siphon and a short length of plastic tubing to siphon your wine to a clean secondary (carboy) fermenter while trying to pick up as little of the sediment as possible from the bottom of your primary fermenter. Make sure that you sanitize all equipment which will come in contact with your wine! Your carboy should be full (up to the base of the neck) with your wine must when you have completed the racking. If not full, top the carboy off with reserved juice (if available) or clean water. Seal your carboy with a bung and airlock.
Want an easy way to get started making fruit wine? BlueStem has 3-gallon, 5-gallon and 6-gallon fruit wine kits available on our website. The kits are available in several configurations and include all the equipment you need plus a wide variety of fruit choices (yes, the fruit and other ingredients are included!) with all required ingredients included (pre-measured).
If you prefer a grape wine, BlueStem has 6-gallon winemaking equipment packages available which you can use in conjunction with a WinExpert ingredient kit. We stock the Vintner’s Reserve, World Vineyard, Selection Original, Selection International, Selection Estate, Selection Limited Edition and Selection Speciale kits (these are 3 gallon kits) available in many, many varietals (including Riesling, Chardonnay, Zinfandel, Shiraz, Merlot). These kits make very, very good wine!
Tomorrow’s topic: Bottling your first wine!
Sunday, July 1, 2007
Website Shipping
Our new website at www.bluestemwine.com is finally finished (at least 99% done anyway!). One of the biggest struggles we have had with the site is how to have the site calculate shipping expense. Our old website had a shipping calculator on it for FedEx shipping but also allowed for delivery via the post office.
The problem with shipping calculators on websites is that they really do not know how to account for differences in items being shipped. Some items are light yet bulky while others are small and heavy. The shipping calculator also lacks the ability to think through the items being purchased to determine which items ship well together. Also, the calculator will keep putting everything into one package until the FedEx maximum of 70 pounds is reached--even though there is no way that some items can be cartoned up together for shipment. It seemed like there were quite a few times when either the customer was getting raked over the coals because items could be combined for shipping and the shipping calculator was charging for multiple packages or we were getting shorted on shipping because the calculator did not separate items into multiple packages when it should have.
So . . . we come to our new website and have to decide how to determine shipping expense.
After a lot of deliberation we decided to charge a one time "packaging" fee of $6.00 on every order for winemaking or beer brewing equipment and supplies and have all other shipping expense buried in the cost of our item. The necessity of having a handling fee is because of the frequent very small orders that we receive. If you bump the cost of a package of yeast by ten cents to help cover shipping expense that works with a large order where the yeast is combined with many other items also helping to cover shipping expense. It does not work if all that is ordered is a packet of yeast. Ten cents does not get anything to anywhere!
The handling fee encourages customers to combine orders and take advantage of the fact that the fee is charged only once per order. On large, heavy items (such as WinExpert wine ingredient kits or BlueStem's Best beer ingredient kits) it works in the customers favor to order multiple items. As an example, it usually costs about $16.00 to ship a 15 liter WinExpert kit (sometimes more, sometimes less depending on the distance from BlueStem to the customer). We build an additional $10 into the cost of each of these kits to cover shipping expense (as compared to our competitors who just charge retail plus shipping). If you order one WinExpert kit you pay for the kit plus $6.00 handling. With the additional $10 built into the price and the handling fee our customer basically is paying $16 for delivery of the kit which is usually what it costs via FedEx.
However, if two of the 15-liter kits are ordered the customer is charged $10 additional in the product pricing for each of the kits plus the one time $6 handling fee for a total of $26 shipping. BlueStem has to ship these kits in separate packages because of weight restrictions and so it costs the Winery $32 to ship (a savings of $6 to the customer over making two separate kit purchases).
The moral is that the more a customer can combine purchases (order more but order fewer times) the more the customer can save on shipping expense.
The advantage to BlueStem on this is that we save packaging time because customers are making larger purchases rather than multiple small purchases.
Ideally we would love to set our pricing on the web identical to or pricing in the store and have a website shipping calculator that would magically calculate every shipment to exact cost for shipment. It's not going to happen, se we just try to do the best we can with what we have to work with.
Questions? Give Vern a call at BlueStem Winery at 319.346.1046. BlueStem Winery carries a complete line of wine making equipment, ingredients, supplies and ingredient kits and also carries home brewing equipment, ingredients, supplies and features our own brand of ingredient kits called BlueStem's Best.
We are at your service! Come visit us on the web at www.bluestemwine.com!
The problem with shipping calculators on websites is that they really do not know how to account for differences in items being shipped. Some items are light yet bulky while others are small and heavy. The shipping calculator also lacks the ability to think through the items being purchased to determine which items ship well together. Also, the calculator will keep putting everything into one package until the FedEx maximum of 70 pounds is reached--even though there is no way that some items can be cartoned up together for shipment. It seemed like there were quite a few times when either the customer was getting raked over the coals because items could be combined for shipping and the shipping calculator was charging for multiple packages or we were getting shorted on shipping because the calculator did not separate items into multiple packages when it should have.
So . . . we come to our new website and have to decide how to determine shipping expense.
After a lot of deliberation we decided to charge a one time "packaging" fee of $6.00 on every order for winemaking or beer brewing equipment and supplies and have all other shipping expense buried in the cost of our item. The necessity of having a handling fee is because of the frequent very small orders that we receive. If you bump the cost of a package of yeast by ten cents to help cover shipping expense that works with a large order where the yeast is combined with many other items also helping to cover shipping expense. It does not work if all that is ordered is a packet of yeast. Ten cents does not get anything to anywhere!
The handling fee encourages customers to combine orders and take advantage of the fact that the fee is charged only once per order. On large, heavy items (such as WinExpert wine ingredient kits or BlueStem's Best beer ingredient kits) it works in the customers favor to order multiple items. As an example, it usually costs about $16.00 to ship a 15 liter WinExpert kit (sometimes more, sometimes less depending on the distance from BlueStem to the customer). We build an additional $10 into the cost of each of these kits to cover shipping expense (as compared to our competitors who just charge retail plus shipping). If you order one WinExpert kit you pay for the kit plus $6.00 handling. With the additional $10 built into the price and the handling fee our customer basically is paying $16 for delivery of the kit which is usually what it costs via FedEx.
However, if two of the 15-liter kits are ordered the customer is charged $10 additional in the product pricing for each of the kits plus the one time $6 handling fee for a total of $26 shipping. BlueStem has to ship these kits in separate packages because of weight restrictions and so it costs the Winery $32 to ship (a savings of $6 to the customer over making two separate kit purchases).
The moral is that the more a customer can combine purchases (order more but order fewer times) the more the customer can save on shipping expense.
The advantage to BlueStem on this is that we save packaging time because customers are making larger purchases rather than multiple small purchases.
Ideally we would love to set our pricing on the web identical to or pricing in the store and have a website shipping calculator that would magically calculate every shipment to exact cost for shipment. It's not going to happen, se we just try to do the best we can with what we have to work with.
Questions? Give Vern a call at BlueStem Winery at 319.346.1046. BlueStem Winery carries a complete line of wine making equipment, ingredients, supplies and ingredient kits and also carries home brewing equipment, ingredients, supplies and features our own brand of ingredient kits called BlueStem's Best.
We are at your service! Come visit us on the web at www.bluestemwine.com!
Subscribe to:
Posts (Atom)


