Thursday, September 27, 2007

Homebrewing Equipment Needed

Beermaking Deluxe Equipment Kit Time gets away from me! It has been two weeks since my last daily blog post. My webmaster is going to be all over my case about taking some time off! Actually, when you own a winery, there are times when other duties call and we have been busy filtering several tanks of wine and getting ready for a large bottling project.

Anyway, our latest blog posts have been focusing on homebrew ingredients and the steps involved in the beer brewing process and today we are going to focus on the homebrewing equipment you will need.

BlueStem Winery has several equipment packages that range in price from the mid-$50 range up to the mid-$80 range and these kits include all the basic equipment required for homebrewing with the exception of a brewpot, a floating thermometer and bottles (or kegs).

Since we are focusing on beginning beer making we will itemize only the basic equipment included in these homebrewing equipment kits. Basic equipment included with our beer making kits include various combinations of the following equipment:

6.5 gallon primary fermentation bucket;
6.5 gallon bottling bucket;
Bucket lid, drilled & grommeted to accept an airlock;
5-gallon Secondary Fermenter (glass, also known as a carboy);
Easy Clean (a no rinse cleanser);
5/16" Auto-Siphon (other kits may contain a Racking Cane instead);
5/16" Siphon Hose;
Bottle Filler;
Triple Scale Hydrometer;
Beer Bottle Brush;
Red Baron Twin Lever Bottle Capper;
Liquid Crystal Thermometer; and
a Home Beermaking text.

The primary fermentation bucket, the bottling bucket and the lid for these are all food grade plastic. The primary fermentation bucket is where your beer is placed after the boil has been completed and you are ready to begin fermenting your beer (known as wort until it ferments). The fermentation process is completed in this container and then, if you have a secondary fermenter, the beer is siphoned to it. If you do not purchase equipment which includes a secondary fermenter (glass carboy) then you would siphon the beer from the fermentation bucket to the bottling bucket when fermentation is complete.

The bottling bucket has been pre-drilled to accommodate an Italian Bottling Spigot. The siphon tubing is attached to the nozzle on the spigot and when you are ready to bottle you can gravity-flow your beer from the bucket, through the spigot and tubing and through the bottle filler into your bottles. Our Bottle Filler is the spring-tip type which requires that you press down on the bottle filler to begin the flow of beer into the bottle. If you prefer, you may remove the spring and beer will flow as soon as the valve tip touches the bottom of the bottle.

Our kits all included 8 ounces (enough for about 16 gallons) of Easy Clean cleansing powder. All equipment used should be washed with dish soap and then rinsed with water. You may then rinse your equipment with cleansing solution and begin making your beer. Everything you use must be washed, rinsed and sanitized prior to it touching your beer. Many other cleansing products are available (some much stronger than Easy Clean). I have used Easy Clean for many batches of wine and homebrew and have yet to have a bacterial infection get started.

Some of our kits include an Auto-Siphon and others include a Racking Tube. The racking tube requires the attachment of siphon tubing and that you suck on the end of the tubing to get your siphon started. The auto-siphon also requires a length of tubing but it is a simple pull-push on the center section of the siphon which starts the process (very easy!).

The airlock is filled with water to the line and is attached to the bucket lid (through the grommeted hole) or is attached to a bung which is then inserted into the top of the carboy. This device allows for the escape of carbon dioxide gases created during the fermentation process while keeping pesky critters who like sugar away from your beer.

The Hydrometer is your most important tool. This is used to measure the beginning sugar content of your wort (expressed as specific gravity) and also measures the progress of the fermentation by measuring the decrease in specific gravity as the sugars ar fermented into alcohol.

The Beer Bottle Brush is exactly that. A brush for scrubbing out used beer bottles. Remember to sanitize these, too!

The Liquid Crystal Thermometer is attached to the side of your primary fermenter and is used to monitor the ambient temperature of your wort.

The Red Baron Bottle Capper has a magnet to hold the bottle cap and when tipped on top of your beer bottle, the twin levers crimp the bottle cap in place.

The text provided is a beginning brewing text. We always suggest that as you develop in this hobby that you purchase (available on our website) a copy of Charlie Papazian's text, the New Complete Joy of Homebrewing.

We look forward to hearing from you. We publish a newsletter quarterly on our BlueStem Winery website in addition to doing sometimes daily blog articles on either brewing or winemaking. We stock a complete line of home brewing equipment and home brew supplies plus a complete line of winemaking ingredients, equipment, supplies plus many, many wine ingredient kits from both WinExpert and Cellar Craft.

Monday, September 10, 2007

Making Beer 101

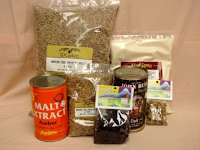
Home Brewing Ingredients Home brewing is a four step process (but most homebrewer's do only three).

The first step is called malting and is usually done by malting companies. This process begins by activating enzymes in the grain so that during the malting process. After the malting process the grains are dried (called kilning) which makes it possible to store the grain for a longer period of time and it also enhances the flavors and aromas that are removed in the brewing process.

The second step in the home brewing process is called mashing. Here the grains are soaked in hot water. The starch present in the grains dissolve in the hot water. The most prevalent sugar produced in this process is maltose and these malt sugars are what the yeast feeds on during fermentation. If you brew with malt extract this mashing process has been done for you (the syrup is condensed (and possibly dried) malt sugars).

The third step in the brewing process is the boil. Water, malt sugars and other ingredients are combined in a brewpot (usually stainless steel) to make what is called wort (beer before it contains any alcohol). The process of boiling the wort sanitizes the ingredients. Hops are added to the wort (at different times in the boil). The earliest hops added are the bittering hops and the boiling process removes the oils from the hops which bitter the beer. Hops added at later stages in the boil are to add flavor or aroma. When the beer has been boiled (usually for approximately 60 minutes) the wort is cooled rapidly so that yeast can be added to the mix.

And finally we are ready to convert our wort into beer. When the yeast has been cooled the yeast is added (or pitched). Usually within 12 hours the yeast will have found a home in the wort and will begin the fermentation process (conversion of the sugars into alcohol and carbon dioxide). For most beers that a home brewer makes this fermentaton will take from just a few days to approximately a week. Other beers (including strong ales and lagers) may take several months to fully ferment. When fermentation is complete the beer is ready to either bottled or kegged.

Looking for a source for your home brewing supplies or your winemaking ingredients? You can count on BlueStem Winery to be courteous, prompt and knowledgeable. Your home brewing ingredients are a phone call or a web order away. Our web prices include shipping (store pricing is somewhat cheaper) and we keep a well-stocked warehouse of home brewing supplies and wine making equipment.

Saturday, September 8, 2007

The Four Brewing Ingredients

home brewing equipmentThe four homebrewing ingredients (or brewing at any level for that matter) are malt, hops, yeast and water.

Malt is the source of sugar and this sugar is converted by the yeast into two by-products: carbon dioxide and alcohol. Malt is grain that has been prepared (i.e. malted) for use in brewing beer and the grain most commonly used is barley. Other grains are used for different styles of beer (Weizenbier is made from wheat malt). The amount of alcohol produced in the brewing process is directly related to the amount of malt added to the wort (what beer is called before it is beer). Home brewing enthusiasts can add malt (sugar) to their wort using several types of malt including malted grains, malt extract syrups and dried malt extract (or DME).

Hops are added to the beer wort in relatively small quantities. Hops are available in several forms including plugs, pellets, leaf and fresh whole hops. Most homebrewers use pellet hops because they are the easiest to use and store and are the most widely available. Depending on when hops are added the the wort they provide bitterness, flavor or aroma.

Yeast is available both dry and as a liquid. As stated before, yeast converts the sugars present into alcohol and carbon dioxide. The carbon dioxide escapes during the fermenting process. When the fermenting process is complete the sugars are mostly gone and you have beer that is flat. By adding corn sugar to your beer as you bottle it you provide just enough sugar for the yeast to again ferment (in the bottle). This produces enough carbon dioxide to carbonate your beer.

Water makes up the bulk of your beer ingredients! The most important thing about water is that you use good water. You can use tap water if it tastes good. If your water does not taste good then purchase some bottled spring water and use that.

Thursday, September 6, 2007

Cellar Craft & WinExpert Wine Kits - Rule 7

Cellar Craft Showcase Yakima Valley SyrahThe last rule is an easy one . . . well, maybe not! You've all heard the old axiom about serving no wine before its time. Well, our last rule has to do with patience.

Cellar Craft and WinExpert wine ingredient kits are ready to bottle in a short period of time but you need to allow them time to age and develop their individual characters prior to consumption.

My general rule of thumb is that I like to allow the whites to age for a minimum of six months and it is better to wait a year, the reds I like to age a minimum of a year and it is better if you can wait two.

Is this hard and fast? No! Nothing says you can't sample a bottle now and again to mark the wine's progression toward perfection.

One of my favorite stories about one of my customers is about Barb and Clarence. They were in the shop a couple of years ago. They love Gewurztraminer! They try every kind that they can find! They saw a WinExpert Gewurztraminer wine kit on the shelf and inquired about it. They did not want to make the wine themselves but they did want the wine. I agreed to make the wine for them and a couple of months later I called Barb and told her that her wine was ready. I had even filtered the wine and put it in blue bottles for an authentic look.

When Barb arrived at the store I told her that her wine needed to age and that she should take it home, put it in the basement and forget it for awhile.

Well, two weeks later I got an e-mail from Barb telling me that they had tried the wine and that it was not very good! I reminded Barb about patience and told her that I did not want to hear back from her for another 6 months or so.

About six months later I got an e-mail from Barb stating that the Gewurztraminer was good and getting better every bottle.

Clarence and Barb came in a couple of times after that and purchased both a Riesling and a Liebfraumilch for me to make for them.

When Clarence came in to pick up the last wine I had made for them I asked about the Gewurztraminer (which was now 15 months old). Clarence told me that they had only one problem--they had only ten bottles left and it was the best Gewurztraminer they had ever had!

Some kit wines will be very drinkable right away but all of them will improve if given a little bit of time!

Wednesday, September 5, 2007

Cellar Craft & WinExpert Wine Kits - Rule 6

Cellar Craft Italian Reserva Pinot GrigioToday's rule deals with temperature and more specifically the range of acceptable temperatures and also the maintenance of a consistent temperature.

Wine ingredient kits have a suggested temperature range (usually somewhere in the mid-60 to somewhere in the mid-70 degrees Fahrenheit). This can vary be manufacturer, type of wine being fermented and type of yeast used in the kit.

Wineries use a much wider temperature range when making wines (sometimes down into the 40 degree range) because they have a much longer period of time to bring their wine to the table.

Commercial wine kits are trying to bring you an excellent product in the minimum amount of time and the narrow temperature range used is a balance between rapid yeast growth and flavor development.

Yeast does not like temperatures too low nor too high and maybe more importantly, yeast does not like temperature fluctuation. Low temperatures in the location that the home winemaking is being done will result in very slow fermentation and potentially a wine that will not clear.

Yeast subjected to wide temperature fluctuations may result in a stuck fermentation.

BlueStem Winery would be happy to have you as a winemaking (or home brewing) customer! We offer a full line of winemaking ingredients and equipment as well as a full line of homebrewing supplies on our website. We offer courteous service, prompt delivery and are always willing to visit with you about your winemaking, brewing or any problems you might be having. We have delivered to every state, every Canadian province and anywhere from Peru to Pakistan!

Tuesday, September 4, 2007

Cellar Craft & WinExpert Wine Kits - Rule 5a

WinExpert Selection Original GewurztraminerAn afterthought to Rule 5! There are other times that vigorous stirring is necessary in your wine.

Most wine ingredient kits will have fining agents (Chitosan, Isinglass, etc.) included with them. When it is time to add these to your wine it is most likely also the time that you will want to stabilize your wine (usually the addition of potassium sorbate which is also known as wine stabilizer).

It is time for a vigorous stirring! Do NOT rack your wine. Fining agents work better in "dirty" wine. Add your fining agent and then stir your wine for several minutes. Stir the sediment which has accumulated on the bottom of your carboy back up into your wine. I know! This goes against all sense of logic. The fact is that the fining agents will work much better if you do this. Instead of racking you add the fining agent and stir and then leave your wine to set for an additional week to 10 days prior to racking again.

This vigorous stirring will do something to your wine in addition to bringing up the sediment. It will drive off carbon dioxide gasses which have accumulated in the wine. If these gases remain in your wine they will prevent the fining agents from working correctly. Some recipes call this degassing your wine. Stir hard and keep stirring until the wine stops foaming. My personal favorite method of stirring the wine is to use either a Wine Whip or a Mix-Stir both of which are available on BlueStem Winery's website.

In addition to making our own label wines, BlueStem Winery carries a full line of winemaking ingredients and a complete line of homebrewing supplies.

Thursday, August 30, 2007

Cellar Craft & WinExpert Wine Kits - Rule 5

Cellar Craft Porto Corinto When you put your wine ingredient kit together one of the things that will most likely be part of the instructions is that after putting the ingredients into the primary fermenter that you stir vigorously!

You will find that the concentrated juice provided with your kit seems to mix easily with the water that you add but in actuality, the juice will settle to the bottom of the fermenter because it is heavier than the water you add.

This will have the affect of giving you a false initial hydrometer reading. Since wine ingredient kits are pretty much on target with where the hydrometer reading should be, the fact that you get a reading which is out of the suggested range should be a clue to you that something is not right. Stirring the fermenter vigorously will disburse the water and juice concentrate evenly.

Another problem may be when you sprinkle the wine yeast onto the top of the fermenter. There will be a lesser supply of sugar at the top of the fermenter and your yeast may not get off to a quick and healthy start. If the yeast does settle through the thinner layer at the top it may still not be able to ferment properly in the high sugar environment of the unmixed juice concentrate.

Another benefit to aggressive stirring at this early stage is the oxygenation of the wine must. We preach, preach, preach about keeping air away from your wine must to prevent the oxygenation of your wine. That is true when you have wine. But at this moment you have juice, not wine. Yeast loves oxygen. By aggressively stirring the wine must you will provide a good source of oxygen for the yeast and help it get off to a robust start.

Whether you are looking to make your wine from a WinExpert ingredient kit or from a Cellar Craft ingredient kit, from fresh fruit or from one of the BlueStem fruit wine ingredient kits listed on our website at http://www.bluestemwine.com/ we can help you get off to a great start. BlueStem Winery, in addition to carrying a complete line of winemaking supplies, also carries homebrewing equipment, supplies and ingredients for the home brew enthusiast. We offer prompt, courteous and knowledgeable service.

Tuesday, August 28, 2007

Cellar Craft & WinExpert Wine Kits - Rule 4

Italian Reserva NebbioloOur next rule when making WinExpert or Cellar Craft winemaking ingredient kits is that you need to fill the primary fermenter to the proper level with good, clean water. What I mean here is that if you are making a six gallon (23L) wine kit you need to make sure that you have the primary fermenter full to the six gallon mark.

If you put an excess amount of water into your mix you will lower the specific gravity (which reduces the potential alcohol of your wine) and it will also dilute the body characteristics (your wine will be less full-bodied).

If your intent is to make a more full-bodied wine and you intentionally underfill your fermenter there are a whole different set of potential consequences. Wine kits are manufactured with a certain quantity of wine (30 bottles normally) being the intent. Acid levels in the wine are balanced with this in mind. Underfilling your primary fermenter may cause your finished product to be overly acidic. There are other possible consequences as well including the disruption of the typical fermentation process.

BlueStem Winery offers a complete line of winemaking ingredients and also is well-stocked with home brewing ingredients, equipment and supplies. We put together our own line of home brewing ingredient kits known as BlueStem's Best plus we are proud to be retailers for both Cellar Craft kits and WinExpert wine ingredient kits. Our website features a handling fee of $6 per order with all shipping expense included in the price of each item purchased.

For prompt, knowledgeable and friendly service BlueStem Winery can be counted on to be there for you!

Monday, August 27, 2007

Cellar Craft & WinExpert Wine Kits - Rule 3

Cabernet Franc Icewine Style Many, many times I have told customers that there are only two rules for making homemade wine: First, read and follow the directions and second, keep your equipment clean.

There is no doubt that these two rules are the most important but there are a few other rules, too, and even though I am writing this blog article in the context of making wine from WinExpert or Cellar Craft ingredient kits the same rules apply to any wine making that you do.

Our third rule is that you should keep records. Keep a pad and pencil close by your winemaking area so that you can write down exactly what you did and the environment in which you did it.

Things you should record are the ambient temperature of the area in which you are making wine, the temperature of your wine must, the specific gravity of your wine must, the date you put together your wine must, the date you pitched the yeast (with temperatures), the total acidity of your wine must (WinExpert and Cellar Craft kits are acid balanced so this is not as important with these kits but it is important if you are making wine from backyard fruit or grapes you raised or purchased). If you do any other testing (such as pH) be sure to record this information, too. Also make a complete listing (with quantities) of any additives you put in your wine (such as acid blend, yeast nutrient, pectic enzyme, etc.).

As your wine progresses, be sure and continue to make notations with dates of specific gravity changes and anything else that you feel is important in the progession of from juice to wine and continue right on through bottling (and even aging). If this particular wine becomes one of your cellar classics you want to be able to duplicate the process you used in making this wine.

Other ideas on making wine or homebrewing your own beer can be found in other blog articles or in our newsletter. You can find our newsletter on the newsletter page at www.bluestemwine.com and then clicking on the links to our .pdf files.

BlueStem Winery is a full-service winemaking and home brewing supply store located at 305 Third Street in Parkersburg, Iowa. You can visit our website at www.bluestemwine.com or drop by our store. All pricing on the website includes shipping within the lower 48 states.

Sunday, August 26, 2007

Cellar Craft & WinExpert Wine Kits - Rule 2

Sonoma Dry Creek Valley Chardonnay As I have said in a previous blog post, I tell new winemakers that women make better winemakers then men because the two most important rules are read and follow the directions and keep your equipment clean and women are better at both of these then men. In my previous blog we talked about reading directions and today we will visit the subject of keeping your equipment clean.

You need to protect your wine from oxygen (to prevent oxidation) and you need to protect it from bacterial infection (this is the cleanliness part!).

First, always wash your equipment with a good detergent soap and rinse it well with good, clean water. The is the cleaning part of the equation. This step removes the dirt and grime which may have accumulated on your equipment from previous usage or just from being idle for awhile. Second comes the sanitizing of your equipment. Sanitizing is different from cleaning in that this is the step that involves the application of a chemical or chemicals to your winemaking equipment that give as little opportunity as possible for the start up of a bacterial culture. Whether you use Easy Clean or http://www.bluestemwine.com/oscommerce/product_info.php?cPath=21_41&products_id=615&osCsid=2a2fdaf586c59e28d189deb8112c3ac0 or a solution of Potassium Metabisulphite the important thing is that you sanitize each and every piece of equipment that comes in contact with your wine each and every time that it does!

They are moving fast! BlueStem Winery recently added the Cellar Craft lineup of winemaking ingredient kits from Cellar Craft International and they have been a hit! Two more went out the door today (a Showcase Gewurztraminer-Riesling blend wine kit and a Showcase Yakima Valley Viognier). I have three of these new kits in process right now, the Washington Reserve Late Harvest Riesling, the Showcase Yakima Valley Pinot Gris, and the Showcase Walla Walla Cabernet-Merlot. Check out the links to take a look at these products on our website at http://www.bluestemwine.com/!!

Saturday, August 25, 2007

Cellar Craft & WinExpert Wine Kits - Rule 1

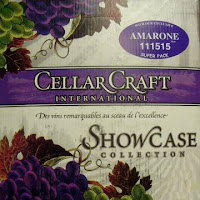
Cellar Craft Amarone

Always read the directions! You may be an experienced kit winemaker but things sometimes change. Sometimes Cellar Craft or WinExpert will change the procedures because of new technologies or because of variances in the raw ingredients they are using to build the kits. The procedures vary slightly between companies, too, as the procedure recommended with the Cellar Craft kit may vary to a degree from those recommended by WinExpert.

Pay attention to what the company recommends regarding when to rack your wine, when to stir the wine and to their recommended procedures for fining the wine ingredient kits.

BlueStem Winery is a licensed and bonded winery located in northeast Iowa. We operate a winery, a winemaking and homebrewing supplies store and also have a wide range of gift items which include wine accessories and stemware, Amish quilts, and gourmet foods. We are on the web at www.bluestemwine.com but welcome you to visit our store if you are in northeast Iowa. We are located at 305 Third Street in downtown Parkersburg, Iowa and look forward to seeing you at the store or we look forward to being of service to you on the web. We offer prompt, courteous service. Questions are taken via phone or e-mail and are answered promptly.

Friday, August 24, 2007

Sanitizing with Metabisulphite (or Metabisulfite)

I have fun at the store with male winemakers (when they are accompanied by their wives) by telling them that women make better winemakers then men because there are only two rules for making good wine. First, you need to read and follow the directions. Second, you need to keep your equipment clean. Women are better at both of these then men! The wives have a good time with this!

On a more serious note, keeping that equipment clean is an absolute must (no pun intended) when making wine.

There are several ways to approach sanitizing your equipment and we will cover just one today: using Potassium Metabisulphite (or Metabisulfite) powder to sanitize your equipment.

To make a final rinse solution for your equipment and if bottling, for your wine bottles, from Potassium Metabisulphite powder simply mix one teaspoon of Potassium Metabisulphite powder in a quart of water. For your wine equipment, just rinse the surfaces with this solution to sanitize. If bottling, you can make the solution and then pour it into your bottles (cover all the inside surface of the bottle) and then drain. If you have a bottle tree with a rinse attachment (called a vinator), fill the basin with solution and then rinse the inside of the bottles with the vinator. Do not rinse with water! Allow the wine bottles to drain. This will not only sanitize your bottles but it will also help add shelf life to your wine.

As always, all winemaking and homebrewing items mentioned are available on our website at www.bluestemwine.com. Take a look! We offer prompt, friendly and knowledgeable service.