Thursday, December 17, 2009

Enzyme Packet Usage with Crushed Grape Cellar Craft Red Wines

Cellar Craft has recently started including an Enzyme Blend packet with all of their red wine kits which contain a bag of crushed grape skins. The packets received here at BlueStem Winery did not receive instructions on proper use but instructions have now been obtained from Cellar Craft.

There are several problems that this enzyme packet is designed to address among which is a problem with an oily film developing on the surface of the red wines and also a problem with wines not clearing properly.

Please note these points:

The enzyme is deactivated by the use of Bentonite so the wine must be racked prior to adding the enzyme.

The enzyme is most effective if added when fermentation is complete or nearly complete (specific gravity less than 1.000). The crushed grape wine kits benefit from extended contact with the grape skins so it is recommended by Cellar Craft that the first racking be delayed until day 10 to 12. The skins can then be discarded and the enzyme added to the wine.

Primary fermentation: As per normal instructions.

Secondary fermentation: On day 10-12 rack wine per instructions to clean carboy. Add enzyme after racking is complete.

Stabilization, clearing and bottling as per normal instructions.

If you have questions you can e-Mail BlueStem Winery at bluestemwine@mchsi.com or call us at (319) 346-1046 or (from the United States) you can call Cellar Craft direct at (800) 665-1136.

Sunday, April 5, 2009

Immersion Wort Chillers

Immersion Wort ChillerWhen home brewing the results are much more satisfactory if the beer wort is cooled down rapidly after the boil is completed. One of the options available for this cool down is a piece of homebrewing equipment called an immersion wort chiller.

BlueStem Winery sells an immersion wort chiller (pictured at left) and has them available both in our store and on our web site. For the home brewer who wants to spend the time, this piece of homebrew equipment can be fairly easily fabricated at home with a coil of copper rubbing, a couple pieces of plastic tubing, hose clamps and hose ends.

Rapid cool down of wort helps prevent the formation of compounds which alter the flavor or your beer and it also brings the wort into the yeast pitching temperature range quicker. The earlier yeast can be added to the wort the less chance there is of bacteria being able to get a foothold.

Immersion wort chillers consist of a coil of metal (usually copper) tubing with a short piece of flexible tubing attached to each end with hose connectors on the ends of this flexible tubing. The ends of the copper coil are bent upward so they both end at the upper end of the wort chiller. This allows the wort chiller to be lowered into the beer wort with the two hose ends out of the brewpot. One end of the wort chiller is connected to a cold water source and the other end is taken to a drain. Cold water is run through the copper coil and this process of heat transfer warms the water in the coil (and cools the beer) and this warm water is run to the drain. The constant replacement of the water in the coil with cold water rapidly chills the wort.

Choosing the correct metal coil for your wort chiller is important. Both copper and stainless steel tubing work well but copper is typically less expensive. Using 3/8th inch tubing seems to work the best. This tubing is available in different thicknesses and the lighter the tubing used the greater the efficiency (more surface are in relationship to the volume of wort displaced).

You will need approximately 25 feet of copper tubing plus two hose clamps and either a short piece of garden hose (20 feet or so) or flexible tubing that will slide over the copper tubing and garden hose ends with compression fittings.

The first step in the manufacturing process is the bend the metal tubing into a coil of a small enough diameter so that it will easily fit into your brew pot and still allow at least a couple inches of clearance between the coil and the side of your brew pot. Two points to remember here: First, remember that if your copper coil gets a kink in it it will not pass water through fast enough to chill your wort, and second, plan on leaving enough metal tubing at each end to create a bend that will allow your chiller to hang on the edge of your brew pot. This way the hose clamps will be outside your brew pot and in the event of leaks it will leak outside of your brew pot and avoid contamination of your wort.

Metal tubing is typically in a coil when purchased. You can bend this tubing into tighter coils by hand (be careful not to kink it!). It will probably be easier if you find a cylindrical object long enough hold the coil being made and simply wrap the tubing around the object in a tight coil with each coil next to the previous one. Leave approximately two feet of uncoiled metal tubing at one end.

Next, bend the short end of the metal tubing out from the coil at a right angle to the coil. Then bend the longer end (the two foot section mentioned in the prior paragraph) so that it goes up the side of the coil toward the top of the coil and at the same position where the short end of the the metal tubing was bent outward, do the same with the long end so that two end resemble hooks that can hang over the edge of the brew pot.

Cut your garden hose (or flexible tubing) in half or in the lengths that will best suit your purpose. Slide a hose clamp over both ends of the metal tubing. Slip the hose endings over the metal tubing and tighten the hose clamps.

Your chiller is complete! Run one end of the chiller hose to your water source and the other to a drain and you are ready to being chilling wort. Sanitation of your chiller? Not a problem! Simply lower the chiller into your brew pot about 15 minutes prior to the end of the boil and the heat present in the boil will sanitize your chiller.

In need of homebrewing supplies or winemaking ingredients? BlueStem Winery stocks a complete line of beer ingredients and supplies for wine making at home. We also have our own line of home brewing kits known as BlueStems Best (available in many, many beer brewing styles) and we also stock a large inventory of winemaking kits from both WinExpert and Cellar Craft. Wine making was never so much fun! Cellar Craft wine kits and WinExpert kits are both very, very easy to use and always, if you have a question, the people at BlueStem Winery can help you solve your problem.

Friday, March 27, 2009

Adjusting Acid Levels in Wine

Our recent winemaking blogs (the past 4) have dealt with various aspects of the acidity levels in wine. Now that we know the desired levels of acidity for various types of wine and the tools we need when making wine to determine the present level we also need to know how to raise and lower the acid levels if they are too high or too low.

Compare your acid test results with the desired acidity range for the type of wine that you are making. It is very easy to raise acid levels. You can use the acid blend that is available on the BlueStem Winery web site to increase acidity. The addition of 3.9 grams of acid blend will raise the acid level present in one gallon of wine by 0.1%. The type acids present in the acid blend you use is also important. BlueStem Winery custom blends its own acid blend and it consists of 50% tartaric, 40% malic and 10% citric acids. A large percentage of the acid blends sold by wine shops contain 50% citric acid (because it is cheap!) rather than the more desireable tartaric acid which is much more expensive. If you do not have a scale you can guesstimate by using a set of measuring spoons from the kitchen. A level full quarter teaspoon will weigh approximately 1.2 grams. A full teaspoon will weigh approximately 5 grams.

Increasing acid levels is easy. Having to decrease acid levels is a less desirable situation. Large decreases in acidity are very undesirable. BlueStem Winery has three products available for the decrease of acid levels. First there is either calcium carbonate or potassium carbonate (these can be used interchangeably) and then there is a product called Acidex.

Use the carbonates to reduce acid levels only if you are going to reduce acids by 0.4% or less. Two and one-half grams of carbonate will lower one gallon of wine by 0.1% TA. Use the instructions on the Acidex package for directions on its use. For those without a scale, a quarter teaspoon of carbonate weighs about a half gram and a full teaspoon weighs approximately 2.5 grams.

Enough on the home wine making for a few days. Our next blog articles will deal with some aspects of beer brewing including some home brew supplies and brewing equipment. My son is a big Guinness fan and I have to get my home brewing stuff out and get a batch of BlueStems Best Irish Stout in the works. A large number of our customers have said that this Irish Stout tastes better than Guinness and we'll put that theory to a major test with my son! Check out our complete line of beer making supplies and wine making kits on the BlueStem Winery web site. We carry both the WinExpert and Cellar Craft wine kits and either will make you a fine batch of homemade wine!


Thursday, March 26, 2009

Measuring Wine Acidity Using a pH Meter

This is the fourth (in a series of 5) blog articles relating to wine acidity issues when making wine. After our next home wine making article on wine acidity we will turn our focus onto an issue of interest to our home brewing clientele.

If you have access to a pH meter you can use this device to measure wine acidity in a method very similar to that accomplished using the acid testing kit described in our just previous blog article. Accuracy of your results would be the reason for purchasing a pH meter versus the testing kit. One of the problems with the test kit is that darker colored wines are very difficult to see at what point the color change occurs. This problem is eliminated with the pH meter.

What you do is start off the same way described in my previous post (add the color indicator to your wine sample). Start adding the reagent (the sodium hydroxide) to the wine/indicator solution a drop at a time. Swirl the mixture thoroughly after adding each droplet and take a reading with the pH meter. When the pH meter reads 8.2 (this would correspond to the timing with the acid test kit when the color indicator changes color). The number of droplets added will again indicate your acidity level.

Be careful with your pH meter! Be sure and clean the device thoroughly after each use, protect the probe from damage from mishandling and be sure and calibrate the pH meter each time you use it using fresh buffering solution.

BlueStem Winery is not only a licensed winery but also has a fully stocked store and warehouse of beer brewing supplies, winemaking ingredients and a large inventory of both Cellar Craft and WinExpert wine making kits. Although our name indicates that we are heavily into winemaking we do carry a significant amount of beer making supplies and have our own line of beer brewing kits known as BlueStems Best. We are a full service brewing supply store and welcome your visit (either in person or on-line) the next time you need brewing supplies or wine making supplies.


Monday, March 23, 2009

Using an Acid Test Kit to Measure Wine Acidity

A simple and inexpensive way to measure the acidity level (TA) is to purchase a home wine making acid test kit from the BlueStem Winery web site. This acid testing kit uses a titration method to determine the acid level present. Without teaching a lesson in high school chemistry, titration testing involves the addition of a reagent (in this case it is sodium hydroxide) to a mix of your wine and a color indicator (phenolphtalein).

A wine sample (15ml) is drawn and placed in a test tube. Three drops of the color indicator are drawn and added to the wine sample. Swirl the test tube until the wine and indicator are thoroughly mixed.

Next a syringe is used to draw 10ml of the reagent. The reagent is added to the test tube containing the wine/color indicator at the rate of 0.5ml. After each addition the test tube is swirled to mix the reagent with the wine/color indicator. As the drops are added the color of the mix in the test tube will change. White wines will turn pink, red wines will turn gray/black. As the test tube is swirled the color change disappears. Keep adding the 0.5ml droplets until, when swirled, the wine/indicator mix does not go back to its original color. Each milliliter of reagent used indicates an acidity level of 0.1% TA. Correct acidity levels for various types of wines was presented in my just prior blog entry.

BlueStem Winery is a wine making and homebrew supply retailer located in Parkersburg, Iowa and on the web. BlueStem features a comple line of beer brewing and wine making equipment plus an excellent assortment of our own BlueStems Best home brewing ingredient kits and an extensive inventory of both Cellar Craft and WinExpert wine kits. You can expect that you will not be treated like a purchaser at a big box home brew equipment retailer. We offer beer ingredients, brewing equipment and beer brewing kits at reasonable prices but our time and advice provided in any quantity free of charge. We take the time to see you through any winemaking or homebrew problem.

Saturday, March 21, 2009

Recommended Levels of Acidity in Wine

When you drink a glass of wine, the acids which are present are what provide the crisp, tart taste. If a wine tastes flat it is because the wine has too little acid present. If your wine has too much acid present it has a sour taste (like a grapefruit). Wine which have what is referred to as proper balance are wines which have the correct level of acidity, alcohol, sugar, etc.).

Dry wines require a lower acidity level then sweet wines because the presence of sugar helps mask the tartness of the acids. Dry white wines should have an acidity level between 0.65% and 0.75% while dry red wines require a slightly lower acid level of 0.60% to 0.70%.

Sweeter white wines generally have an acid level between 0.70% and 0.80% or even slightly higher. Sweet red wines should have acid levels between 0.65 and 0.75% or slightly higher.

Wines made from lighter colored fruits (apples, pears, peaches, etc.) have a recommended acid levels between 0.55% and 0.65% while darker colored fruit wines (plums, raspberries, blackberries, etc.) need to have acid levels between 0.50% and 0.60%.

The percentages expressed are referred to as titratable acidity (or TA) by those making wine and are a percentage of volume.

For those who are wine making at home from wine kits such as the Cellar Craft and WinExpert wine kits that BlueStem Winery sells on our web site there is no need to test for acidity levels as the winemaking kits have been acid balanced when produced.

Our next blog article will provide information on how to measure the acidity present when you are making wine. The BlueStem Winery on-line wine making supply store has the acid testing kit you need.

In addition to keeping an inventory of everything you need for wine making at home our on-line store also has the supplies you need for making homebrew beer. Beer brewing is a great alternative to wine making with your finished product being ready for consumption in about 5 weeks (as oppposed to the much longer period required for aging wine).

Wednesday, March 18, 2009

Punching the Cap (Part 2)

My blog article of March 16 provided information about punching down the cap (especially when making wine from one of our wine kits that has crushed grape skins or from fresh fruit of any kind). This blog article is a follow-up on that winemaking article and offers some hints for punching down the cap.

First, when starting a new batch of wine be sure and use a primary fermenter which is large enough for your batch. Keep in mind that when you are punching down the cap that you will be inserting a spoon or other stirring device into the must and then agitating it. If you are making one of our Cellar Craft or WinExpert wine kits which contain crushed grape skins you need a fermenter large enough to contain the 6 gallons of juice, the stirring device you will use and a 2 liter bag of crushed grape skins and still provide enough head space for the fermentation of the wine.

You can use a variety of utensils to punch down the cap. Examples would be spoons (solid or slotted) made of stainless steel or PVC plastic. Break up the cap and stir the cap down into the must until the cap is totally broken up and everything is moist.

Punch down the cap the first time right after you pitch your yeast. This will aerate the must and incorporate the yeast into the must. Fermentation will begin shortly and the carbon dioxide bubbles will cause suspended matter to be pushed to the surface which will form the cap. Punch the cap down at least three times (more is better) per day to keep the broken up and moist.

When fermentation begins to slow because the supply of sugar is decreasing the solid matter present in your wine must will sink rather than float (there is no longer enough carbon dioxide gas to push the solids to the surface).

BlueStem Winery is a full-service wine making and brewing supply outlet located in northeast Iowa and on the web. Although BlueStem Winery is a licensed winery our store offers both beer brewing and wine making supplies, brewing equipment, our own line of brewing kits known as BlueStems Best and wine kits from both WinExpert and Cellar Craft. We offer beer brewing equipment, beer ingredients and everything else you need for home brewing. Our website features shipping for only $8.95 to anywhere in the lower 48 United States for any quantity of beer kits, brewing supplies and wine making supplies you may wish to order. We can help you make great home brew beer or assist you in wine making at home.

Sunday, March 15, 2009

Punching the Cap

I do enjoy driving my Ford truck but this has nothing to do with Ford trucks or caps in the context of a baseball cap. When making wine the cap we are discussing is the layer of stems, seeds and bits of grape skins that are pushed to the surface of your primary fermenter by the carbon dioxide gasses being produced as the yeast consumes sugars present in the must. This cap is a layer of foam and the bits described previously that rise to the surface during fermentation. The term usually ascribed to breaking up this layer of foam and disbursing it back into the wine must is punching down the cap.

Why is it important for someone engaged in home winemaking to punch down the cap? If making wine from one of the Cellar Craft or WinExpert kits that we sell it is not as important (you can do it once or twice a day rather than 3 or more times per day) unless you are using one of the wine kits that include a crushed grape skin pack. Cellar Craft wine kits from their Showcase series of red wines all include a two liter package of crushed grape skins. Punching down several times (at least 3) a day when using one of these wine making kits is very important. It is also important if you are making wine from fresh grapes or any other fresh fruit and of lesser importance if the winemaking is done using juice or from one of our wine making kits which does not include grape skins.

Here is a concise list of reasons why you should punch down the cap when wine making at home:

1. Tannins and flavors and colors which are in this cap will be added back into your wine must.
2. The potential for bacteria formation in this layer of foam is reduced. Heat which is a natural product of fermentation is not allowed to be trapped under this layer. Warmth provides fertile ground for bacterial growth.
3. Yeasts which may be imbedded in this layer are moved back into the wine must.
4. By the very act of stirring and pushing down the cap oxygen (which is beneficial to your yeast) is introduced into the wine must.

BlueStem Winery offers a complete line of beer brewing and wine making supplies at our retail outlet in Parkersburg, Iowa. We are also on the web with our complete inventory of brewing equipment and winemaking ingredients. We feature both Cellar Craft and WinExpert wine kits for wine making and hour own line of home brewing beer kits known as BlueStems Best. Visit our website at bluestemwine.com and you will find friendly service, prompt delivery and knowledgeable answers to your home brewing and winemaking questions.

Wednesday, March 11, 2009

Yeast Nutrition

For yeast to start the fermentation process and for it to continue the process through to a full fermentation it needs an environment rich in nutrients. If your must lacks proper nutrition you may have wine that does not begin fermentation or that becomes stuck (stops fermenting) or which develops a rotten egg smell (hydrogen sulfide develops which is caused by a shortage of nitrogen).

Nutrients which wine must requires include nitrogen (nitrogen produces protein which is required for the development of new yeast cells), oxygen (without getting too scientific, oxygen helps the initial yeast cells procreate rapidly) and trace vitamins and minerals (these include phosphorus, urea, citric acid, and amino acids among others).

BlueStem Winery markets it own line of beer brewing kits (known as BlueStems Best), home brew equipment, wine kits from both WinExpert and Cellar Craft for wine making at home, and home brew supplies from Muntons, Briess, Brewmart and others. Cellar Craft wines from their Showcase Collection produce world class wines as do wines from our selection of WinExpert wine kits. If you are looking at getting started in either the home winemaking or home brewing hobby, BlueStem Winery has the home brew supplies, homebrew equipment and winemaking ingredients you need for these great hobbies.

Monday, March 9, 2009

Choosing the Water to Use

Whether your are home brewing or making wine from one of the WinExpert wine kits you are using water for the boil when beer brewing or you are adding water to the juice concentrate that is in your winemaking kit. How important is the choice of the water you use? The home winemaking and home beer brewing folks at BlueStem Winery believe your choice of which water to use can have a huge impact on the quality of your final product. You have made a significant investment in either your brewing ingredients or in one of our WinExpert or Cellar Craft wine kits and you do not want to put the quality of your home brew or wine at risk because you do not use quality water.

So what are your choices? If you live in a community of any size you most likely have access to municipal water. If you live in a rural area your water may very well come from a well. Distilled water can be purchased at most every grocery store and from many other sources. Bottled water (not distilled) is also available at grocery stores and many other places and in some areas you might also have access to spring water. Which should you use?

Municipal water (tap water) has typically been treated with chlorine tor chloramines to depress bacteria levels. If you can smell chlorine in a glass of warm city water you should not use the water without first boiling or filtering the water to remove the chlorine. Boiling water removes the free chlorine but not chloramines (call the city water folks and ask them whether they treat your city's water with chlorine or chloramines). Chloramines can be removed by filtering your water with an activated charcoal filter and then treating the water with 10 parts per million of sulfites. The fact that your brewing ingredients are boiled takes care of the chlorine (not chloramine) problem for any water used in the boil. Remember that water added after the boil could still have chlorine in it. An activated charcoal filter which has been impregnated with silver will remove bacteria and also flouride from your water. If using a water filtration system remember to change your filters often to prevent bacteria growth within the filters.

Well water has a whole host of problems associated with it including bacteria, iron, trace minerals, and in agricultural areas nitrates. Rural water is typically very hard and many people use a water softener and this infuses the water with sodium which creates another source for bad tasting wine or beer. Use an activated charcoal filter to remove particulates and a silver impregnated one will also remove bacteria. Our first recommendation if considering the use of well water is . . . don't.

The distillation process (or a reverse osmosis water filter) removes virtually everything from your water that can impact your wine or beer . . . both negatively and positively. Wine and beer needs some mineral content in the water to provide food for the yeast. If using distilled water use a small amount of yeast nutrient to provide food for your yeast.

Bottled water is typically water which has been purified but not distilled. Perfectly good for making wine or beer but not as good as using spring water (and usually more expensive!).

Spring water is an excellent water to use for either beer brewing or wine making. Spring water has the trace minerals necessary to provide food for your yeast but it does not have the flouride, chlorine or other contaminants. Purchased spring water has been tested for purity but not all water sold as spring water is really spring water. Some spring water is just tap water being passed off as spring water. Read the bottle label and look for the source of the water. Sometimes the bottler will use a code such as PWS as the source (Public Water Source). Actual spring waters will list where the water actually came from.

BlueStem Winery is a licensed and bonded winery located in Parkersburg, Iowa. In addition to marketing its own label wines, BlueStem carries a complete inventory of beer brewing equipment and supplies for wine making at home plus wine kits from both Cellar Craft and WinExpert and our own line of home brewing kits known as BlueStems Best. We would love to hear from you!


Wednesday, March 4, 2009

Paper (ur . . . Glass) or Plastic?

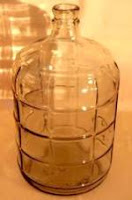
Glass CarboyBlueStem Winery (in addition to being a licensed winery) operates a full-service beer brewing and home winemaking supply store in Parkersburg, Iowa and on the web. Every once in awhile I have a home brewing or winemaking customer ask about using plastic carboys (the glass jug used as a secondary fermenter for making home brew beer or for wine making at home). Some brewers also use a larger carboy as a primary fermenter.

Although I never say never, at the present time BlueStem Winery does not sell nor do we recommend the use of plastic carboys as a secondary fermentation vessel for either wine making or for homebrew beer.

Both types of carboys have inherent advantages and disadvantages but in our opinion the advantages of glass outweigh the advantages offered by the plastic carboy and the disadvantages of plastic outweigh the disadvantages of glass carboys.

Glass carboys have a few very obvious disadvantages. The number one concern regarding this piece of wine making and beer brewing equipment is its weight. The glass carboys simply weigh quite a bit more than the plastic ones. The obvious disadvantage of glass is that it will break (shatter would be a better word and this comes from experience!). Obviously, both of these disadvantages of the glass carboys are advantages for the plastic version.

Another advantage touted about the plastic carboys is that they are cheaper to purchase than plastic. I tend to agree (partially) with this statement. The carboys themselves are cheaper but they also require quite a bit of peripheral equipment that dollars up fairly fast.

Glass carboys offer the following advantages over plastic:

1. Glass is easier to clean and sanitize than plastic and will not scratch when cleaned (every scratch is a potential hiding place for bacteria);

2. It is easier with glass to get a good seal between the carboy and an airlock. Bad seals equal potentially bad wine (it is called oxidation but it tastes like vinegar);

3. Glass is not capable of transferring a chemical or solvent from within the glass itself. Plastic can possibly leach solvents (and bad flavors) from its own chemical composition into the wine;

4. Plastics are not immune to the passage of air through the very plastic itself. Although this is probably of very little consequence during a brief fermentation period it can have negative effects during long term storage. In this sense, plastic would be more viable as a secondary fermentation vessel used for beer (where secondary fermentation is a short period of time) as compared to the secondary fermentation of wine.

Looking for a reliable source for purchasing your beer ingredients or your wine kits? BlueStem Winery is a great place to purchase your home beer brewing equipment, supplies and ingredients. We also stock a great line of winemaking ingredients, supplies and equipment plus a super lineup of both Cellar Craft and WinExpert wine kits.

Sunday, March 1, 2009

Beer Brewing 101

Home brewing is a four step process (but most home brewers only do three of the four).

Malting is the first step and is also the one that most home brewers do not do themselves. They instead allow a malting company to do this for them. After the malting process is complete the grains are kilned (dried) which allows for longer storage times. They drying also enhances flavors and aromas which are then removed in the brewing process.

Mashing is the second step. The grains are soaked in hot water which dissolves the starches. Maltose (the most prevalent sugar produced in this process) and other malt sugars are what the yeast converts to alcohol during the fermentation process. This mashing process has been done for you, too, if you use malt extracts (liquid or dry) instead of grain when you brew.

Step 3 is the boil. Malt sugars, water and other ingredients are combined in a brewpot to make what is called wort (beer before it is beer). Boiling sanitizes the beer ingredients. Hops are added at various times with the first hops providing bittering (the boil removes oils from the hops to do this). Later hop additions provide both flavor and aroma. After the boil (usually about 60 minutes) the wort is cooled and yeast is added.

Usually within about 12 hours the yeast will be at home in the wort and it will begin to convert the sugars into alcohol and carbon dioxide. This fermentation process will take from four to seven days. Some beers (especially lagers) may take several months to fully ferment. When fermentation is complete the beer is ready to bottle or keg.

If you would like to brew your own beer, BlueStem Winery has the brewing equipment you need and will assist you in your beer brewing endeavors.

BlueStem also stocks everything you need if your preference leans toward making wine. BlueStem stocks wine making kits from both Cellar Craft and WinExpert and is always ready to answer your winemaking questions.